

|
Complete
Vespa smallframe engine strip down and rebuild. The clutch on a smallframe Vespa can actually be replaced with the engine in situ, as it has its own access cover. You would need to drain the bike of oil or lay it down on its side (flywheel and kickstart facing down of course) To get at the clutch cover you need to remove the rear wheel and the clutch cable if you have not already done so. Also remove the rear brake/hub by removing the split pin and undoing the central castelated nut. On an alloy wheel there is a thick washer underneath the nut as well which needs to be kept safe. Now you need to undo the three nuts which hold on the rear hub backing plate. It is not necessary to remove the rear brakes to do this, but if you are replacing the brakes (and they are cheap, so you ought to) remove them now and give the backing plate a damn good cleaning.
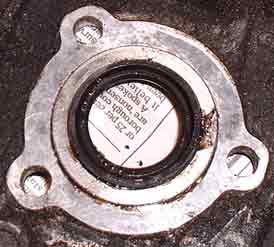
The hub backing plate contains the rear hub oil seal, which should be replaced with a new one. As seen in the picture below the spring needs to face into the engine. There should be a gasket between the backing plate and the engine which should be replaced when you reassemble.
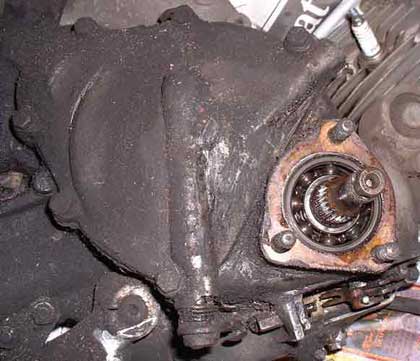
Once the rear hub is removed you will be able to remove the 6 bolts that hold the clutch cover on.
Note that I finally decided to clean my engine just before I did this! When you are done this site will greet you. There is another gasket for the clutch cover which needs to be renewed.
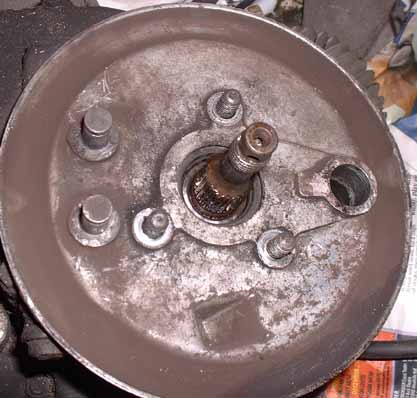
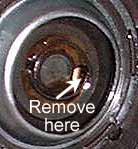
With this nut removed the clutch will be free, but jammed onto the driveshaft if it was fitted properly. Use the proper clutch removal tool for this. It screws down onto the inner clutch basket and has a central bolt that you tighten down and then tap with a hammer to loosen the clutch and remove it from the outer clutch basket. The clutch is located on the driveshaft with a woodruff key (a small half-moon shaped piece of soft metal). Make sure you remove it when you remove the clutch, and don't lose it! Buy some spare ones beforehand as it's a stupid tiny thing to be holding up a rebuild while you wait for new ones in the post. It's not meant to take any load - the clutch being forced onto the tapered crank does that, but it is meant to locate it in the correct position. When the clutch is removed you'll see this:
If you don't have a Vespa clutch spring compressor you can make a perfectly good alternative with a long bolt, a nut and 2 big washers - about 60p from my local ironmongers. At least one of them needs to be bigger than the thrust plate you just removed but small enough to fit inside the thin aluminum ring (this is very soft metal and will not take the pressure). Pass the bolt through the centre of the clutch and put the big washer on it and tighten it all down to compress the spring, and then you can remove the circlip with your finders, some pliers, etc. Inspect all clutch plates and replace the cork-backed ones if they are worn down. They are so cheap it isn't really worth not doing it. The new ones must be soaked in gearbox oil for 24 hours (or as much time as possible) or you'll be doing this all over again really soon! You should also replace the clutch spring if you are replacing the plates - they are so cheap it isn't worth not doing it! If you are not also replacing the metal plates scuff them up with sandpaper to take off any glaze. When reassembling the clutch make sure everything is the right way up. in particular the top plate should be orientated so that the bevel is visible, as in the picture above. Finally, when reassembling the clutch you must make sure that the circlip ends are both located in one of the inner basket grooves and not in the gap or your clutch can and will come apart when you least expect it. |


Back to Tech Index
Previous - Removing the cylinder