

|
Complete
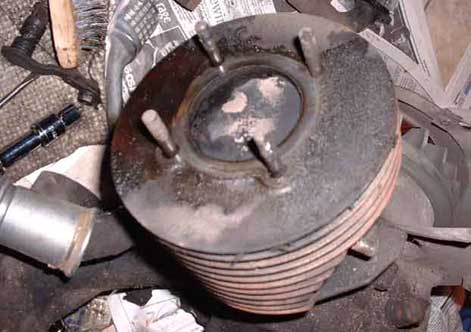
Vespa smallframe engine strip down and rebuild. Before you go any further here it's a really good idea to clean the engine before you start unbolting things, to minimise the risk of debris entering the crankcase or gearbox and damaging anything. The typical well used Vespa engine will be in the filthiest state imaginable with a greasy oily mixture of dirt, dust, oil, petrol, dead postmen, bird's nests etc. get a stiff wire brush and attack it all to remove all loose dirt. The cases then can be cleaned off with petrol, white spirit, or some proprietary cleaner. Oven cleaner will shift anything but most if not all brands will attack and discolour the aluminium engine cases. Once you are ready you can start dismantling the engine. Remove the cylinder shroud. There is a hex head bolt at the rear, a Philips head screw into the flywheel cover, a slot head bolt into the engine near it. There is also a bolt on the clutch side which has often been lost or discarded. You might as well remove the flywheel cover at this point too. Before you remove the cylinder you should unbolt the exhaust manifold from the rear of the cylinder. The inlet manifold goes into the cases so you can remove the cylinder with it on, but you might as well remove it now, and give it a good clean. The inlet manifold has, under the rubber air bellows, a metal sleeve designed to give it a bit of flexibility. It is held on with a circlip, which you should prise apart enough to slip the whole sleeve off. Underneath you will find a felt ring. This seals the join and should be cleaned and soaked in a little bit of two-stroke oil before refitting. The cylinder on a 125cc engine is held on by long bolts that go right through the cylinder and into the head. Undo them and the cylinder head will come off.
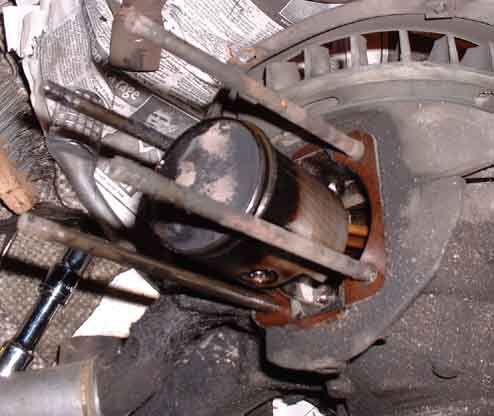
To remove the piston you will need some internal circlip pliers to remove the circlip that holds the wristpin in the piston. Actually you can just about do it with nail scissors but they will be ruined and you run the risk of damaging something (like your eyes) when the circlip pings off. I still havent found out where my old one landed! It's also a damn sight easier to use the proper tools and they are cheap from shops like Machine Mart. You should really replace these circlips with brand new ones. If you are kitting your engine it will come with far superior wire rings to hold the wristpin in place. Do not re-use the original circlips on a kitted engine. You only need to remove the circlip on one side, and you can use a flat screwdriver to gently push the wristpin out of the piston by pushing from the other side in the gap between the two ends of the remaining circlip. You might need to tap on the screwdriver with something, but either way the force needed should be very slight. The wristpin runs in a caged needle bearing assembly which will either stay in the crank small end, stay on the wristpin, or fall into the crankcase - be ready to catch it to make sure it doesn't do the latter. The bearings should remain in the assembly. If it doesn't look perfect then replace it with a new one when you reassemble the engine. |
Back to Tech Index
Previous - Removing the engine from the scooter