

|
Complete
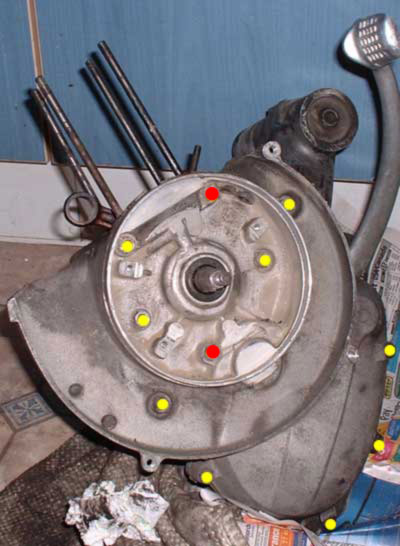
Vespa smallframe engine strip down and rebuild. Having removed the flywheel and stator plate you are now ready to split the cases. Essentially this involves nothing more than undoing all the case bolts and studs and pulling the case halves apart. Indeed the Vespa service manual suggests that's all there is to it. Not quite. The cases will be an absolute bitch to get apart, and you need to apply both brute force and gentle persuasion in equal measure, all the time being careful not to risk causing any damage. The picture below shows most of the bolts and nuts you need to undo. There are a few more round the other side you can't see in this picture.
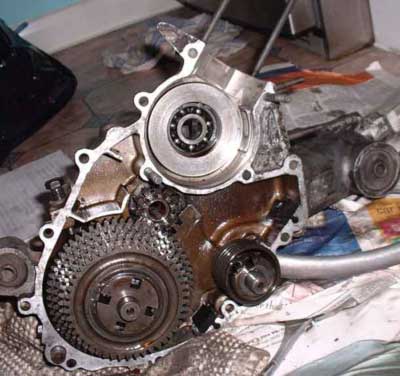
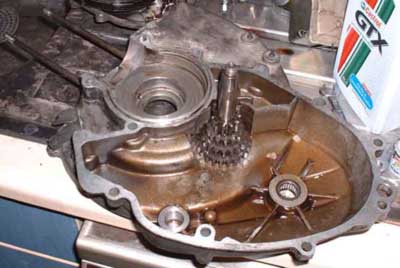
Two of these nuts are attached to studs which remain in the case half rather than bolts which are separated. In the picture above these are marked in red. All the rest are bolts. To make it easier to reassemble the engine make sure you pair each nut/washer/bolt combo after removal and preferably label them so you know which bit of the engine they are from. They are all different sizes, so it's not essential, but why make things harder? Once you have all the nuts and bolts out you will find it quite difficult to separate the cases. Essentially, various bits of engine are holding the cases tohether. You need to basically go methodically round the engine, gradually moving the cases further apart, levering here, wiggling there, a light tap here, a sharp yank there until the cases are separated. This is probably the hardest part of the whole rebuild, so once it's done have a beer. Always keep in mind that these cast aluminium cases are very fragile and brittle in places. Do not apply direct blows to the aluminium, but use something fairly blunt and soft as a drift, and when levering the cases apart use something softer than the alumunium, such as a wooden wedge. You can also use the kick starter as a good levering point, and turning it will help. Do not apply anything but the lightest pressure to the cylinder opening, as a dent or hole here is absolutely the last thing you want. Just be patient and keep pushing, pulling, wiggling and levering until the cases pop apart. Once they have done so you'll be faced with this (the crank has already been removed in this picture - would normally remain in the left hand case half.)
|
Back to Tech Index
Previous - Removing the flywheel and stator