

|
Complete
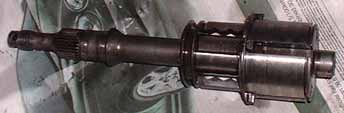
Vespa smallframe engine strip down and rebuild. On the rear axle/gear selector assembly you just removed there is another circlip and gear shim that sit at the other end of the gear cog stack. Remove these as you did the first set. You will be left with the shift dog and the axle assembly - or so it seems. In fact hidden underneath the shift dog is a tube dilled through the axle into which have been placed a spring and two ball bearings. It is these which positively locate the gears (and you can also order a stronger spring if you have a tuned engine which won't stay in gear). Whatever you do don't just pull the gear selector off as the spring will shoot these two ball bearings flying across your workshop and you'll never see them again.
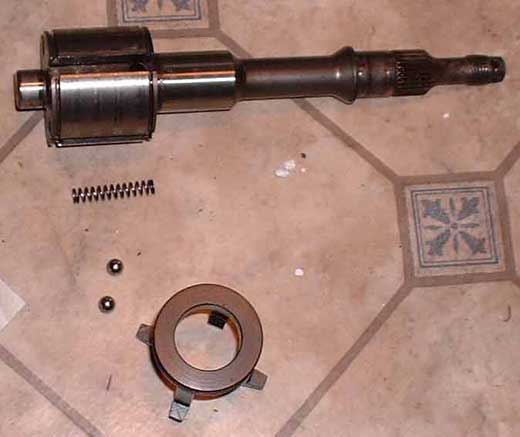
The best way to replace a shift dog is with another old shift dog. Use one to slide the other off with from the opposite end, and then use the new one to push your spare off again, thus retaining the spring and ball bearings with the minimum of fuss and effort. If you haven't got a spare shift dog (and if this is the first time you've rebuilt an engine then you probably don't) you're going to have to do it the hard way. Wrap a cloth or something tightly round the shaft so that any flying ball bearings and springs are instead easily contained in the cloth, and then pull the old shift dog off. Here are the parts you should have.
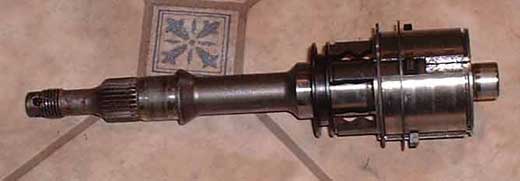
The new shift dog is shown here. Slide this onto the shaft the same way as the other one came off and it should be possible to tilt it slightly so that it blocks off the lower side of the spring tube whilst still allowing access to the upper side. Put one of the ball bearings in and the spring on top of it. You'll need to hold it firmly in this position until you have successfully replaced the top ball bearing. To fit the other ball bearing you'll need a flat bladed screwdriver. I found the absolute perfect shape and size was the wide flat bladed end of an electric screwdriver bit, as where the hex shaft flattens out the curve is perfect for holding the ball bearing in place, and the whole lot was the perfect width. With the screwdriver carefully push the other ball bearing down onto the spring, compressing the spring into the tube, ready at the right moment to slide the shift-dog over the hole and securing both ball bearings and the spring in the tube. You'll probably need a few attempts but calmness and patience will pay off and you'll can replace the gear shim and circlip to finish. Here's the rebuilt assembly:
|
Back to Tech Index
Previous - Removing the gearshift assembly and rear axle